There are three different ways you can pair your TemperBridge to your WiFi network. Obviously, you only need to choose one.
Method 1: Pair over Bluetooth
If you have access to a device with Bluetooth then this method is by far the easiest.
Power up the TemperBridge. On a device with Bluetooth, go to this URL: https://www.improv-wifi.com/. Click the “Connect device to Wi-Fi” button.
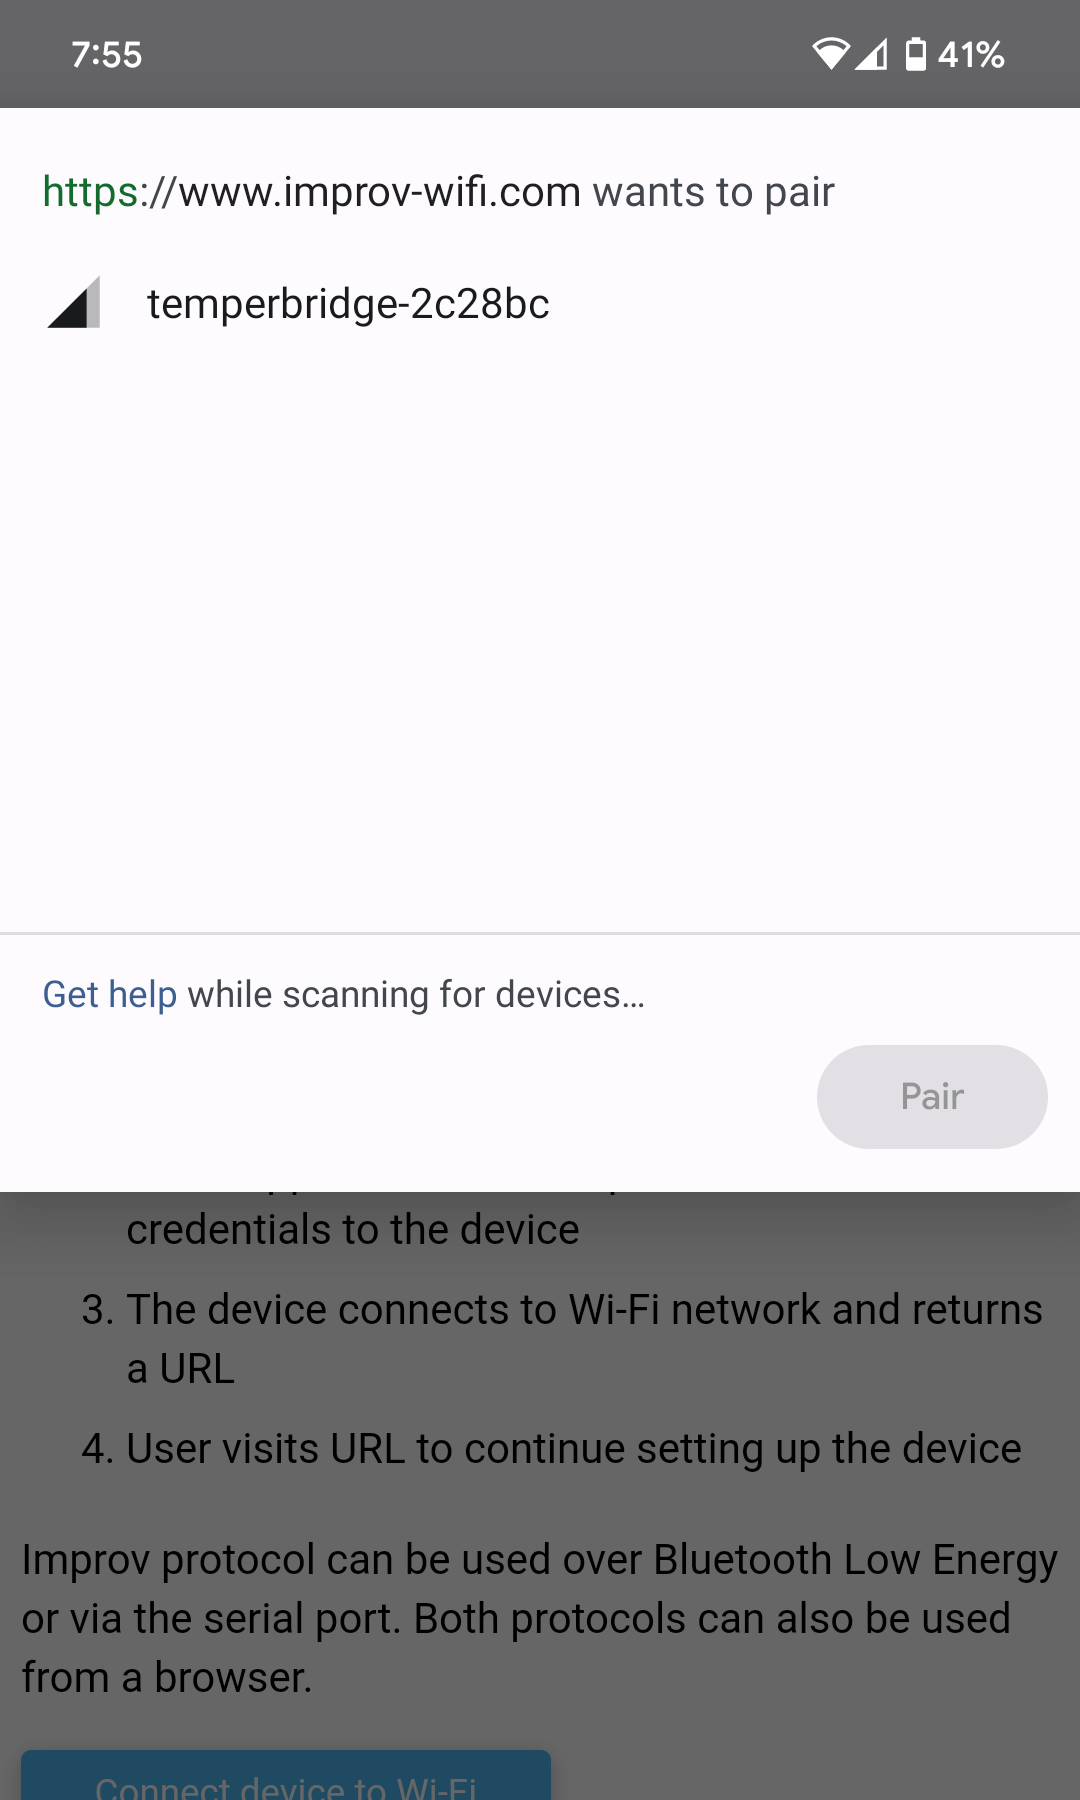
Select your device in the popup and click “Pair”. It will be called something like ‘temperbridge-3f65e1’.
When you are prompted to click the “Authorize” button, click the button on the TemperBridge labeled “FACTORY”. (It’s the button closest to the big red and green LEDs)
Enter your WiFi network name and password, then click “SAVE”. Click “NEXT”. Follow the instructions on subsequent pages to setup the ESPHome integration in your Home Assistant instance.
Proceed to Home Assistant setup.
Method 2: Pair over USB
Use this method if you have a PC or laptop with a USB port.
Plug the TemperBridge into your PC. Go to this URL: https://web.esphome.io/. Click the “CONNECT” button.
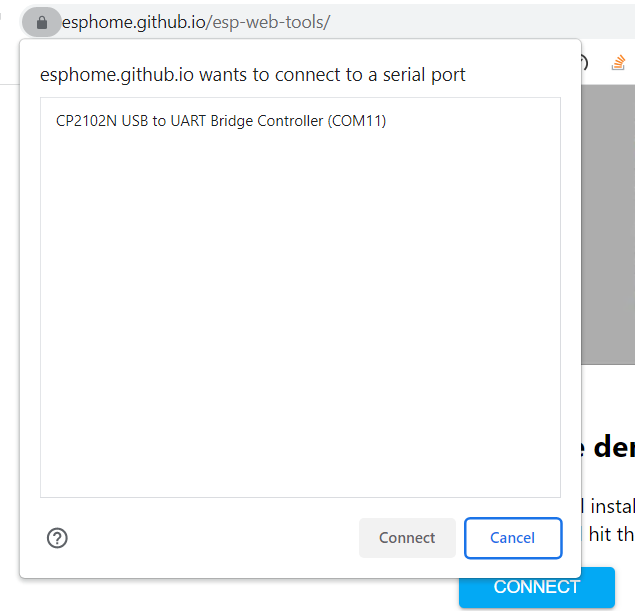
In the popup, select the “CP2102N USB to UART Bridge Controller” device and click “Connect”.
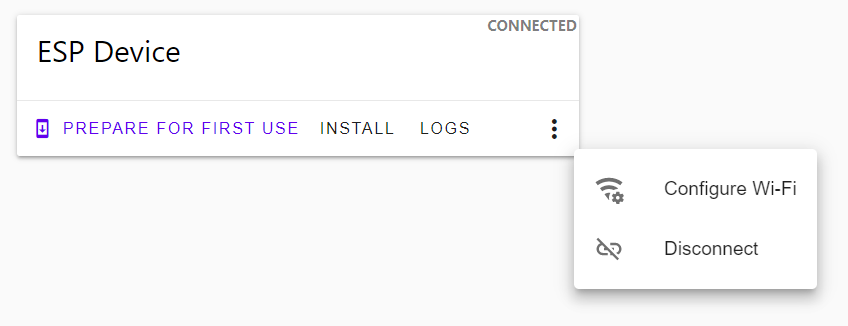
Click the three dots menu, then select “Configure Wi-Fi”. Click “CONNECT TO WI-FI” on the popup. Select your WiFi network in the dropdown and enter the password. Click “CONNECT”.
After provisioning is complete, proceed to Home Assistant setup.
Method 3: Pair over WiFi using captive portal
Power up the TemperBridge. After a few moments, the red LED will blink. Using your PC or phone, connect to the TemperBridge Wifi Config WiFi network. This is a special WiFi network (called a captive portal) that the TemperBridge creates when it is not otherwise connected to WiFi.
Upon connecting, your browser should automatically open the captive portal web interface. (If not, go to http://192.168.4.1/).
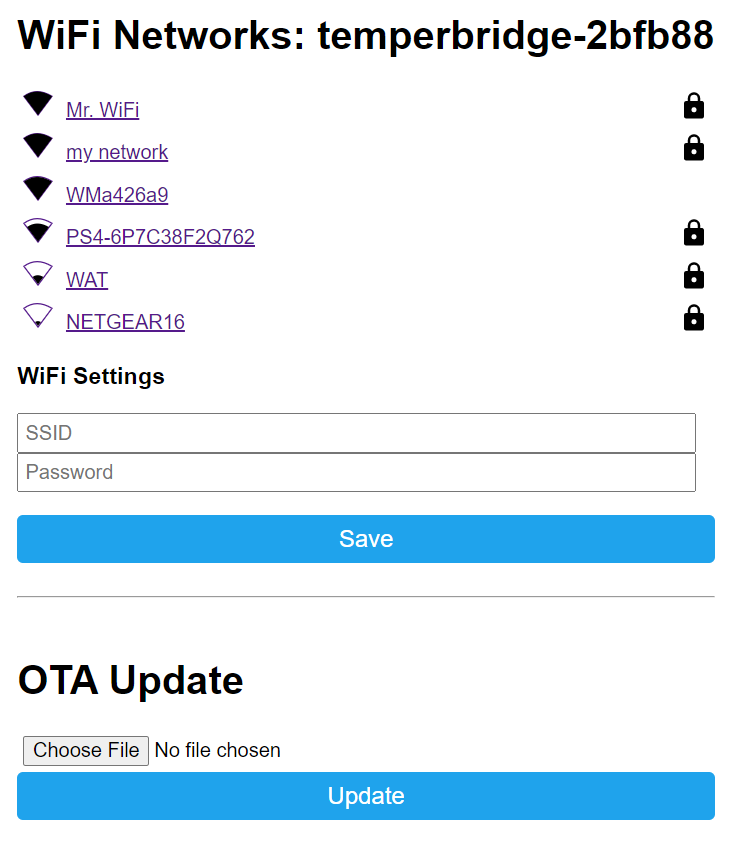
Click your WiFi network, enter the password, then click Save. After about 30 seconds, the TemperBridge Wifi Config network will disappear. Your TemeprBridge should now be connected to WiFi. Proceed to Home Assistant setup.
Verifying connectivity
This step is optional. Connectivity will be verified anyway when you setup Home Assistant integration.
The hostname of your TemperBridge will be something like temperbridge-3f65e1. The last six characters are the same as the last three octets of the MAC address. You can find both the MAC address and hostname on the info page that came with your device.
TemperBridge uses mDNS to advertise itself on your network which is how Home Assistant finds it.
Try pinging your device’s hostname with .local tacked onto the end. For example:
ping temperbridge-3f65e1.local
If this fails, check to make sure your system has mDNS support enabled. On Windows, the easiest fix is to install Bonjour Print Services and then reboot your machine. On Linux, try following these instructions.